Why would we extend an AWS volume?
AWS instances have 8GB of storage available by default, and although we can increment their size when creating them, it doesn't make much sense to pay for resources we're not going to use. The proper way to proceed is to extend the storage as we need to.
Let's take a look at how to do so:
Extend an AWS volume step by step
1. Localizate the instance and select the volume
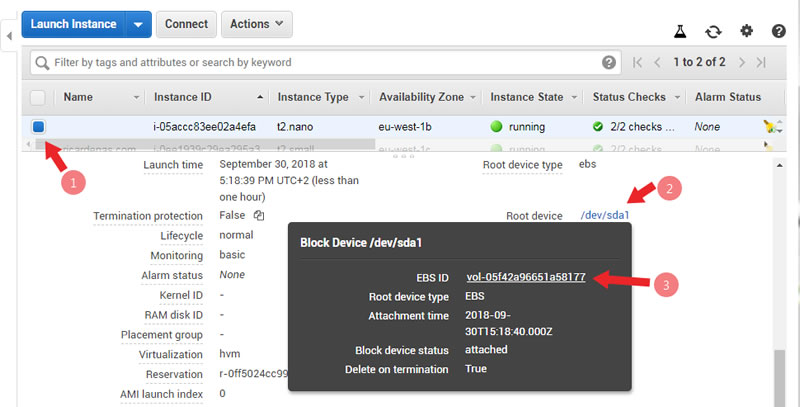
Una vez seleccionada la instancia, nos desplazamos por la ventana inferior hasta que encontramos sus discos duros. Hacemos click sobre el que deseamos ampliar, lo que nos llevará a la ventana de gestión de volúmenes
Once we've selected the instance, we scroll along the lower window until we find the hard drives. Click on the one we wish to amplify, this will take us to the volume management window.
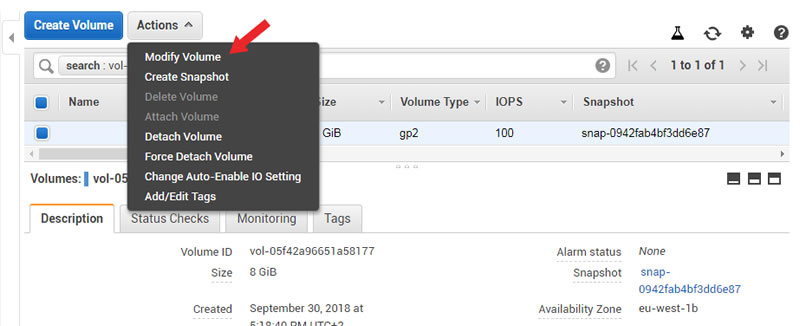
2. Modify the volume
Select Modify Volume yand we'll have access to the window where we'll make any desired changes.
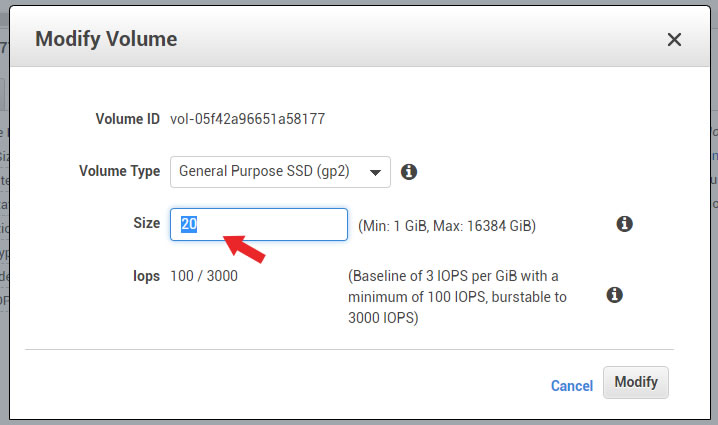
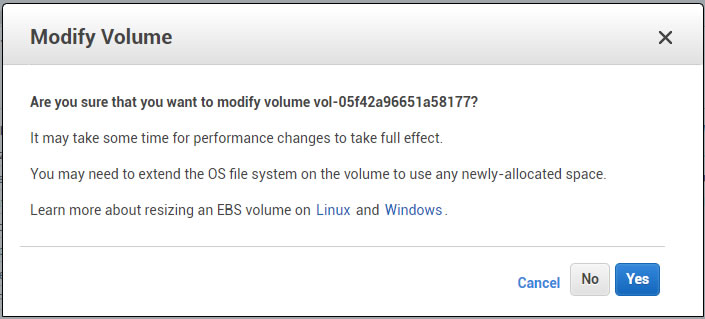
We choose the new size and, if needed, change the type of disk. Click on Modify and a confirmation widow will pop up with the necessary instructions to have the changes take effect.
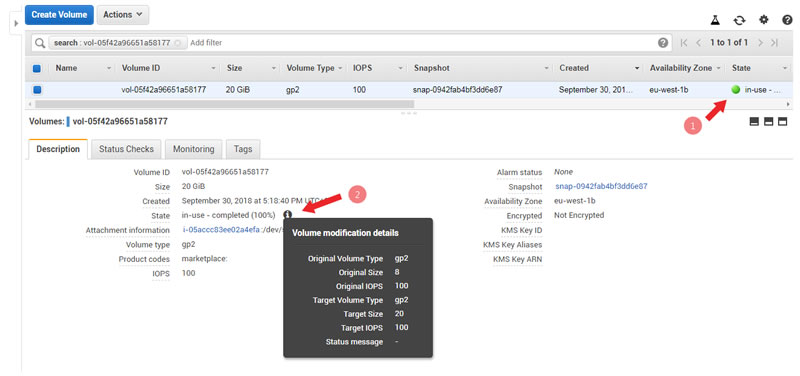
Confirm the changes and wait for the volume to be ready. We can check this by noting when the status indicator turns green. We'll also see at the bottom that the modification has reached 100% completion, which will be confirmed with detailed information.
3. Verify the results
In the case of a Linux instance, we can check that the system alredy acknowledges the new disk capacity, even if it doesn't take full advantage of it yet.

If it's a new generation instance, it should be enough to restart it which will then allow us to make use of the new extended disk.
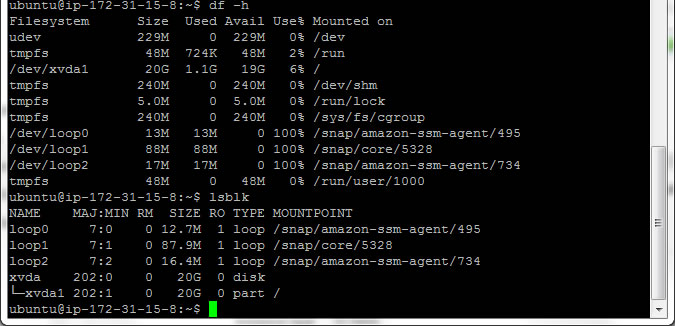
If this isn't the case however, we'll have to modify the partitions using the tools in the Operative System for it.
Limitations in the modifying process
We have seen that the process of extending an AWS volume is extremely simple, and that it can be done in an instant in most cases.
However, there are some limitations, some of which include:
- We can only extend the disk size. If we want to reduce the volume we'll have to create one with the appropriate size and copy the data using the tools in the OS.
- Although the maximum size of a volume is 16TB, it's necessary to take into account the constraints of the subyacent operative system. For example, the startup disk cannot exceed 2TB of space in some AMI.
- In some cases it might be required to split the volume or stop the instance. In these scenarios we'll be notified with the corresponding error message when modifying the volume.
- For older volumes (those associated before 11/1/2016) it will be necessary to split them, associate them again and restart the instance before modifying them.
Finallyt, it's recommended to make a backup before starting the modifying process. A simple way of doing this is making an instant copy of the volume. We can delete it once we're done to avoid additonal costs.

